Monday, February 9, 2009


Priceless Makeup - Offers private or group makeup lessons Introductory

Lesson includes:

-Basic skin care- how often, when and why its important & process.

Extra- microdermabrasion + $40 each


The following include:

colour selection(s), undertone, application, tool recommendations, tips and tricks, critique.


-Foundation

-Concealer

-Powder

-Shadow ( basic beauty tips) Smokey Eye & or the V looks

-Mascara

-Blush

-Lipstick, lip liner & gloss

-Brows- up keep, shaping and filling in.


-Includes Priceless - your personal makeup lesson beauty guide for assistance when we can't be there. Summarizes all steps and application processes. Intermediate lessons--Catered to you needs. -contouring, highlighting, fantasy makeup, lashes ect.


Prices vary depending on time, location, number of people and personal needs and skill level.


Please feel to contact me directly via email


www.pamelapricemakeup.webs.com

Monday, January 19, 2009

Priceless - BRIDAL MAKEUP SPECIAL


Visit my site for more info and contact information.

http://pamelapricemakeup.webs.com/bridalspecial.htm

Pre Wedding Skin Care


Pre Wedding Skin Care


You have carefully planned all the details of your wedding from just the right gown to the perfect photographer. But what about skin care? Problem skin can be devastating for anyone especially a bride-to-be. There are solutions from good at-home care to seeking the advice of professionals.
For mild to moderate skin problems, a good home treatment regimen may be the answer. Products should include a cleanser/make-up remover, a gentle facial scrub, toner, and a moisturizer suited to your skin type.
Home treatment may not be enough for moderate to severe skin problems and you may want to consult with a licensed Esthetician or Dermatologist (preferably a referral from a friend). You may even find a Dermatologist who has an Esthetician on staff.
If you opt for professional treatment, I would suggest a consultation before beginning any kind of treatment.


At Home Tips
Blend or process dry oatmeal to a fine powder. Mix with honey to make a paste. Massage into skin. Leave on for 20 minutes. Rinse, tone, moisturize.
Witch hazel is an excellent, inexpensive toner.
Aloe Vera gel is a great mask for dry skin. Apply to skin. Leave on for 20 minutes. Tissue off bulk of gel and massage the rest into skin.

One to Two Weeks Before the Wedding Try To Avoid
Tanning, both natural sunlight and tanning beds.
Aggressive facials or skin care treatments.
Facial waxing including eyebrows.

Saturday, January 17, 2009

Friday, January 16, 2009

2009 Makeup Trends


The biggest makeup trends for Spring 2009 are as follows:
Smokey Eyes
Thick, Long Eyelashes (Real or Fake)
Pastel Eyeshadows and Blushes
Flawless Complexion


This Spring 2009, it will also be all about BIG eyelashes! If you don’t have them, buy a pair. We saw literally tons of gorgeous false eyelashes on the runway at New York Fashion week. Don’t be scared off by the thought of wearing fake eyelashes though… If you apply them properly, they will add a touch of fantasy to your look. I saw some really pretty ones on MAC. If you’re thinking about trying fake lashes, don’t get cheap ones. You’ll be disappointed.
Flawless skin is always in (heh. That rhymes.) but Spring 2009 is all about the perfect face. You want to moisturize and keep your skin healthy and hydrated. When applying makeup, you want full coverage, especially around the eyes. Your eye makeup won’t stand out if you have big dark circles under your eyes. You want a healthy, dewy, radiant complexion.
Keep blush light and in shades of peach or pastels. You want them sheer and lightweight. No browns or reds. The lighter the better.
Lipstick is the thing for Spring 2009. Glittery, shiny lipgloss is going out. It’s all about the nude and pale lips. Matte lipsticks of flowery pinks, simple nudes, and peachy shades are best. No brown and no more red. Thank goodness!

Finding Your Skin Tone

Before you can begin to choose make-up colors suited to your skin tone, you must first figure out what type of complexion you have. In general, skin tones fall into two categories: cool and warm. Although skin tones are highly varied, all of us can classify our skin as dark, olive or yellow (Asian or Latin people usually have this color), rosy, tanned, or fair. Holding a piece of white paper up to your face and identifying the main color you see will help you decide into which category you fall. Still, it is easy to get confused by these terms, so to simplify the process try this simple test. Try on a white shirt and then a cream or off-white top. If you look better in the white blouse, you most likely have cool skin. If the cream top is more flattering, your skin is probably warm. Another good indicator of skin tone is which jewelry looks best on you. Silver tends to work well for cool skin while gold makes warm skin glow. Either of these methods will help you to easily identify your coloring, at which point you can begin selecting make-up colors that will look excellent on you.


Foundation


Since foundation is the base on which you will build your entire look, it is important that it be perfectly matched to your skin tone. Foundations generally have either a golden or blue-toned base, with variations that flatter a wide group of faces in the warm and cool ranges. Basically, if you have cool skin, choose a foundation that has blue or pink undertones. Use a yellow-base foundation for warm skin. Be sure to test to color on your face (not your wrist or hand!) and have a look at yourself in sunlight to make sure that you have a good match. Once properly blended, your foundation should even out your skin tone but look completely natural. When in doubt, consult a specialist at the make-up counter for help. Remember that if you choose the wrong base, your color will be unattractively distorted.

ALL ABOUT BROWS


How to get well-defined, well-groomed brows1. Brush your eyebrows straight up with an eyebrow brush. Using small straight scissors, carefully trim any hairs that are curly or too long. Then brush the brows back into their natural shape.2. Hold a pencil along the side of your nose to ensure that the inner edge of your brow lines up with the inside corner of your eye.3. Move the pencil so that it intersects with your iris. The arch of your brow should line up with the pencil.4. Angle the pencil from the outside edge of your nose to the outer corner of your eye to determine where your brow should end.5. Tweeze where necessary and fill in with a soft pencil or powder.6. Brush with an eyebrow brush and apply eyebrow gel to keep strays in place. You're done!

Makeup by Pamela Price


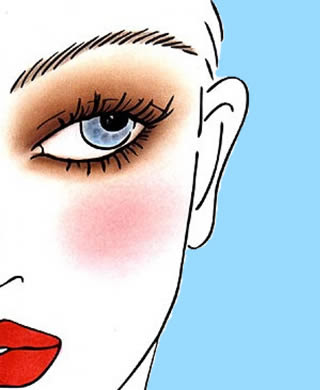
Smokey Eye


Smoky eyes have been a big style for quite awhile and there's no sign this particular trend is dying. Here we show you step-by-step instructions on how to get the perfect smoky eye.The key to the perfect smoky eye is proper blending. You want to make sure colors are blended together flawlessly. Also, it's important to pair light base colors with rich dark colors. Nice mixes include: Soft gold base with deep purple on top, champagne base with bright blue and peach base with green hue.

Difficulty: Easy
Time Required: 5 minutes
Here's How:
Prep the lid. The key to keeping eyeshadow from melting into your eyelid crease as the day goes on is to kept eyelids oil-free. To do this start with an eyeshadow base (also called "primer"). I prefer to dab at bit of
MAC's 'paint' on lids before shadow application. Or try Fresh Freshface Perfecting Eye Primer.
Apply eyeliner. If you're going for a typical black, brown or gray smoky eye, apply liner in one of those colors above the upper lash line, drawing line thicker in the middle of eye. If your opting for a jewel-toned eye (violet makes a gorgeous smoky eye), line eyes with a purple, blue or deep green liner.
Blend in color on bottom lashes For color on the bottom (a key smoky eye look) you'll want a lighter eyeliner. The key is to "smudge it." You can also apply a bit of shadow to get full smudge effect.
Apply light base color Again, the key to a smoky eye is pairing a lighter base with the darker hue. I prefer a nice cream shade for my base. Sweep a light, shimmery shadow over the lids to your browbone. I love
Stila's whipped eye shadows $20. The moist "mousse" consistency seems to stay on forever. My favorite colors are taupe and pearl.
Blend in darker color, but keep dark color below the crease. Now that you have the base and eyeliner on, it's time to get the smoky effect. You need a darker eyeshadow shade. Using an
eyeshadow brush blend in color starting at your lash line, blending up. Make sure to blend color into the lash line so the eye liner disappears. Stop deep color at crease.
Doublecheck your work Make sure eyes match and blend color with a Q-tip if need be.
Finish with several coats of volumizing mascara. Tried and true mascaras (featured in "Elle" magazine's March 2006 issue) include
DiorShow Mascara & L'Oreal Paris Volume Shocking Mascara. Elle's writer says they are the best volumizers she's tried.
Tips:
Remember to keep lips nude. When applying strong makeup (like smoky eyes or red lips) put the focus on either eyes or lips, never both. (Think Angelina Jolie: She either plays up her huge eyes or her huge lips, never both. If she did, she'd look like a clown).
For a bit of fun, try a blue or purple mascara. It will make blue eyes "pop."
Liner doesn't have to come in pencil form. Makeup experts know eyeshadows make some of the best eyeliners. To do this take an eyeliner brush (available at Sephora, MAC or any dept store), wet it, then dab wet brush into the dark shadow. This allows for a deep, precise line. You can also use the dark shadows without wetting brush first. Either way, eyeliner is necessary for smoky eye.
This season go jewel-toned (blue is great for you blue-eyed girls) and keep your eyes smoky but stay away from dark browns and black. Instead, go for a deep purple, a gold-brown or any of the many vibrant colors in this year.

What You Need:
Eye primer (you don't need it, but it's great for keeping shadow in place)
2 Shadows: One light, one darker
Eyeliner
Makeup brushes
Mascara